今天看到專案設定裡面就有可以控制是否要顯示狀態列的選項
General -> Deployment
底下有
Hide status bar(隱藏狀態列)
Requires full screen(全螢幕)

預設都不勾
但是不知道為何我兩個都打勾了之後,
在模擬器上面看到的還是有狀態列..
今天看到專案設定裡面就有可以控制是否要顯示狀態列的選項
General -> Deployment
底下有
Hide status bar(隱藏狀態列)
Requires full screen(全螢幕)
預設都不勾
但是不知道為何我兩個都打勾了之後,
在模擬器上面看到的還是有狀態列..
要在 alert 中加進 pickerView 可以直接 add 就好:
alertController.view.addSubview(myPickerView)
加進去之後 pickerView 的 x, y 會以 alert 的位置開始算,
有點像 margin-left, margin-top
大小、位置要在不同裝置使用很不好控制!
參考來源:
https://itisjoe.gitbooks.io/swiftgo/content/uikit/uialertcontroller.html
https://itisjoe.gitbooks.io/swiftgo/content/uikit/uipickerview.html
用 setBackgroundImage 的方式,背景圖片會自動符合 UIButton 大小
圖片如果是方的,UIButton 是長的,
圖片會被拉長!
設定 UIButton 的方法:
let image = UIImage(named: "圖片檔名.副檔名") as UIImage?
testBtn.setBackgroundImage(image, for: .normal)
我放的圖片位置
先寫好的 UI物件 就會先創出來,
後寫的會疊在上面。
調動順序將物件往上層移要用 bringSubview ,往下層移用 sendSubview:
![]()
實際運用範例(往上移):
//testBtn 是被蓋住的物件
self.view.bringSubview(toFront: testBtn)
往下移以此類推
但是我沒有試驗是移往上一層,還是移到最上層!
如果之後又寫東西出來,沒有設定,會疊在最上層。
參考網站:
https://developer.apple.com/reference/uikit/uiview/1622541-bringsubview
UIButton 、UILabel 都有一個方法叫 isHidden
傳入 true 就會隱藏起來,反之。
前兩天講的 UILabel 創造與消失,如果用在 UIButton(用拖拉方式連結),
那麼在 testBtn.removeFromSuperview() 移除之後,
要做 self.view.addSubview(testBtn) 時會出錯
會出現錯誤 THREAD 1: EXC_BAD_instruction(code=exc_i386_invop,subcode=0x0)
所以用 isHidden 的方式控制出現與隱藏就不會出錯
![]()
//隱藏此按鈕
testBtn.isHidden = true
隱藏時就算點到 UIButton 的位置也不會進入 click 事件中!
UILabel 也有 isHidden 方法,用法一樣。
要實現點擊 UILabel ,UILabel.text 就加 1
就要用到型態轉換
今天只針對 UILabel.text 加數字 10
testLabel.text = String(Int(testLabel.text!)! + 10)
text: String ,所以要相加要先轉成 Int
加完要顯示,就要轉回 String ,否則會出 ! error
根據昨天的 addGestureRecognizer 連結 click
今天要在連結的 function 中讀到是哪個 UILabel
func changeText(gestureRecognizer: UIGestureRecognizer) {
//看你傳了什麼進來,UILabel 就改成什麼
let searchlbl = (gestureRecognizer.view as! UILabel)
searchlbl.text = "25"
}
這樣很多 UILabel 用同一個 function 也可以正常控制進來的那個!![]()
參考網站:
http://stackoverflow.com/questions/27064687/adding-tapgesturerecognizer-to-uilabel-in-swift
自己在 Controller 創出來的 UILabel 無法用內建拖拉的方式來綁定 click 事件
但依然有可以實現的方法
//宣告一個 UILabel
var testLabel = UILabel(frame: CGRect(x: 20, y: 20, width: 80, height: 80))
//連結到 changeText
let gestureRecognizer = UITapGestureRecognizer(target: self, action: #selector(ViewController.changeText ))
//加進要被點下的 UILabel
testLabel.addGestureRecognizer(gestureRecognizer)
//一定要設定 isUserInteractionEnabled 為true,default is NO
testLabel.isUserInteractionEnabled = true
//function 內容
func changeText(gestureRecognizer: UIGestureRecognizer) {
//click 事件發生要做的事
testLabel.text = "25"
}
參考來源:
http://stackoverflow.com/questions/33658521/swift-how-to-make-a-uilabel-clickable
有些狀況下不希望使用者因為轉動手機就讓畫面換方向,
例如利用手機傾斜做感應,就只想畫面有動作而不會換方向
固定方向的其中一種做法:
在 Xcode 中直接設定
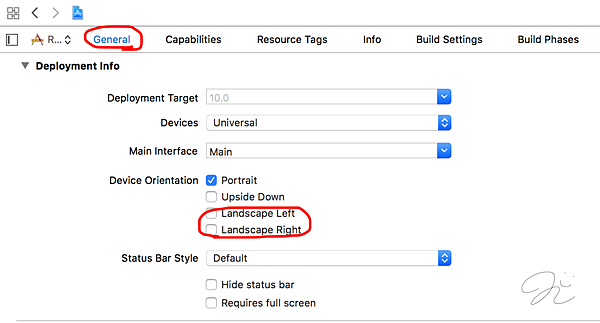
Landscape Left、Landscape Right 打勾是可以轉
不打勾則是不能轉
!三種 Devices 是分開設定的
這是昨天宣告的 UILabel
var testLabel = UILabel(frame: CGRect(x: 0, y: 20, width: 80, height: 80))
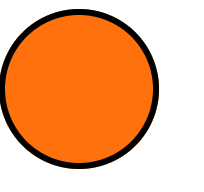
設定圓角會影響的 backgroundColor
testLabel.layer.backgroundColor = UIColor.orange.cgColor
圓角的寫法
testLabel.layer.cornerRadius = 40
數字=UILabel 大小的一半,為正圓形

加上框線
//框線顏色預設是黑的
testLabel.layer.borderWidth = 3.0
//框線顏色設定成綠色
testLabel.layer.borderColor = UIColor.green.cgColor

這個Label 一樣可以設定文字
將 UILabel 做更多變化,
例如:變成圓形
這是宣告 UILabel
var testLabel = UILabel(frame: CGRect(x: 0, y: 0, width: 80, height: 80))
backgroundColor
設 UILabel 底色的方法
有沒有圓角都不影響整個 Label 底色
testLabel.backgroundColor = UIColor.green
將底色設為橘色
如果有圓角,則是會有圓角的底色
testLabel.layer.backgroundColor = UIColor.orange.cgColor
如果兩個 backgroundColor 都有設定,
testLabel.backgroundColor > testLabel.layer.backgroundColor
也就是整個 UILabel 都會綠綠的
要用 UILabel ,
在 Controller 中寫,不在 storyboard 中直接拉的話,
要記得加
self.view.addSubview(testLabel)
可以寫在 button 中,就會再按下後才看到
UILabel 消失(對於指定的 UIView 都會消失 ):
testLabel.removeFromSuperview()
Expected declaration error
![]() 把出錯的那行加到 function 中!
把出錯的那行加到 function 中!
![]()
在 swift2 的 UIColor 用法為:
testLabel.textColor = UIColor.redColor()
在 swift3 時,不用加後面的 Color()
加了會出 error,直接使用即可,例如要紅色:
testLabel.textColor = UIColor.red
內建顏色有:

當然也可以自己設定顏色:
//alpha是透明度,數字越小越透明
testLabel.textColor = UIColor(red: 1, green: 0, blue: 0, alpha: 1)
黑白:
//white越大越白,越小越黑
testLabel.textColor = UIColor(white: 0.3, alpha: 0.7)
文字的顏色用圖片:
檔案位置:

09_cuteseal.jpg原圖:

@IBOutlet weak var testOne: UILabel!
testOne.textColor = UIColor(patternImage: .init(imageLiteralResourceName: "09_cuteseal.jpg"))
還有幾個我沒有列出來的方法,按住 command 點進去就會看到 UIColor class 的內容!
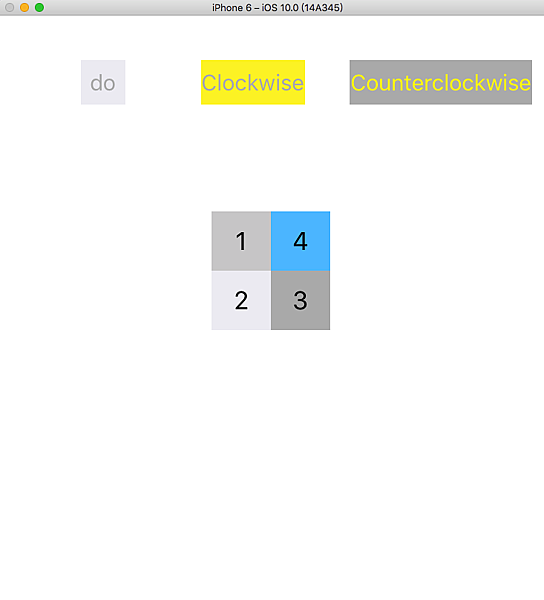
把第三天的方塊改成可以順時針以及逆時針旋轉,
我先宣告一個變數記錄現在位置,用以推斷下個要走的位置
//起始為0
var loc=0
先加入兩個按紐,
@IBAction func clockwise(_ sender: UIButton) { }
@IBAction func counterclockwise(_ sender: UIButton) { }
現在執行完畢之後畫面:
接下來填寫內容,
//順時針按鈕
@IBAction func clockwise(_ sender: UIButton) {
//loc是現在位置,在我們進來順時針時,要先+1,讓他知道下一個位置
if(loc<3){
self.loc+=1
}else{
self.loc=0
}
turnRight(one, two, three, four)
}
//逆時針按鈕
@IBAction func counterclockwise(_ sender: UIButton) {
if(loc<0){
self.loc=3
}else{
self.loc-=1
}
turnRight(one, two, three, four)
}
//我原本沒有想要做逆時針,就取名叫右轉,現在懶得改回去
//順序是以右轉(順時針)來看
func turnRight( _ a:UILabel , _ b:UILabel, _ c:UILabel, _ d:UILabel) {
UIView.animate(withDuration: 0.9, delay: 0.1, usingSpringWithDamping: 0.5, initialSpringVelocity: 0.5, animations: {
//初始位置0,如上面的大圖
//順時針轉動一格,變為1,以此類推
switch self.loc{
case 0:
a.transform = CGAffineTransform(translationX: 0, y: 0)
b.transform = CGAffineTransform(translationX: 0, y: 0)
c.transform = CGAffineTransform(translationX: 0, y: 0)
d.transform = CGAffineTransform(translationX: 0, y: 0)
case 1:
a.transform = CGAffineTransform(translationX: 40, y: 0)
b.transform = CGAffineTransform(translationX: 0, y: -40)
c.transform = CGAffineTransform(translationX: -40, y: 0)
d.transform = CGAffineTransform(translationX: 0, y: 40)
case 2:
a.transform = CGAffineTransform(translationX: 40, y: 40)
b.transform = CGAffineTransform(translationX: 40, y: -40)
c.transform = CGAffineTransform(translationX: -40, y: -40)
d.transform = CGAffineTransform(translationX: -40, y: 40)
default:
a.transform = CGAffineTransform(translationX: 0, y: 40)
b.transform = CGAffineTransform(translationX: 40, y: 0)
c.transform = CGAffineTransform(translationX: 0, y: -40)
d.transform = CGAffineTransform(translationX: -40, y: 0)
}
}, completion: nil)
}
兩天的成果:
2016/11/1
這種移動方法一對的位置都是以原點來算!!
例如:
a.transform = CGAffineTransform(translationX: 0, y: 40)
a.transform = CGAffineTransform(translationX: 0, y: 20)
移動了兩次後,只會從最一開始的地方(x:0, y:0)往 y+20移過去
也就是說,會看到他的 y 變化:0 -> 40 -> 20
而不是一直往下移動
看了幾天官方文件,
實作簡單的動畫,比較有趣跟成就感
拉好畫面之後,也要把該有的元件連到controller
畫面:
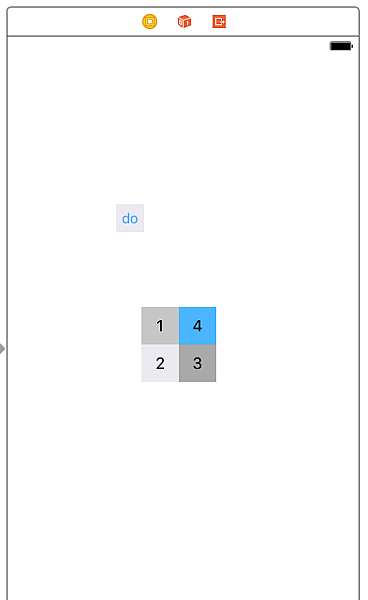
程式碼:
@IBOutlet weak var one: UILabel!
@IBOutlet weak var two: UILabel!
@IBOutlet weak var three: UILabel!
@IBOutlet weak var four: UILabel!
override func viewDidLoad() {
// super.viewDidLoad()
// Do any additional setup after loading the view, typically from a nib.
super.viewDidLoad()
self.one.transform = CGAffineTransform(translationX: 0, y: -300)
self.two.transform = CGAffineTransform(translationX: 0, y: -364)
self.three.transform = CGAffineTransform(translationX: 0, y: 300)
self.four.transform = CGAffineTransform(translationX: 0, y: 364)
}
override func viewDidAppear(_ animated: Bool) {
super.viewDidAppear(animated)
//動畫,分成兩個區塊是因為有快有慢,差別在於delay多久再發動,usingSpringWithDamping是彈跳的反作用力,越小越劇烈
UIView.animate(withDuration: 0.9, delay: 0, usingSpringWithDamping: 0.5, initialSpringVelocity: 0.5, animations: {
//跑回那個物件原來的點
let translate = CGAffineTransform(translationX: 0, y: 0)
self.two.transform = translate
self.three.transform = translate
}, completion: nil)
UIView.animate(withDuration: 0.9, delay: 0.1, usingSpringWithDamping: 0.5, initialSpringVelocity: 0.5, animations: {
let translate = CGAffineTransform(translationX: 0, y: 0)
self.one.transform = translate
self.four.transform = translate
}, completion: nil)
}
@IBAction func doing(_ sender: UIButton) {
viewDidLoad()
viewDidAppear(true)
}
參考原文:
http://toyo0103.blogspot.tw/2015/03/swift_11.html
我還用相同原理刻了順時鐘旋轉!
明天打算來整理整理然後做逆時針![]()
Enumerations and Structures
enum 列舉
enum Rank: Int {
case ace = 1
case two, three, four, five, six, seven, eight, nine, ten
//會自己給rawValue two = 2, three = 3, ...
//Use the rawValue property to access the raw value of an enumeration case.
case jack, queen, king
func simpleDescription() -> String {
switch self {
case .ace:
return "aceA"
case .jack:
return "jackJ"
case .queen:
return "queenQ"
case .king:
return "kingK"
default:
return String(self.rawValue)
}
}
}
let ace = Rank.ace
//ace
let aceRawValue = ace.rawValue
//1
if let convertedRank = Rank(rawValue: 3) {
let threeDescription = convertedRank.simpleDescription()
//3
}
可縮寫為
ace.simpleDescription();
//aceA
Simple Values
陣列、字典 給予空值
宣告變數
Control Flow
??
A = B ?? C B!=nil , A=B;B=nil , A=C
跟三元運算式很像,會變成 A = (B!=nil) ? B : C
let nickName: String? = nil
let fullName: String = "John Appleseed"
let informalGreeting = "Hi \(nickName ?? fullName)"
for in (for each)
let individualScores = [75, 43, 103, 87, 12]
var teamScore = 0
for score in individualScores {
if score > 50 {
teamScore += 3
} else {
teamScore += 1
} }
print(teamScore)
..範圍
for i in 0..<4 {} , i 範圍 0到3
for i in 0...4 {} , i 範圍 0到4
switch不用加break
Functions and Closures
參數
呼叫function都要帶參數名字
如果有加 _ , 就不用加名字
func greet(person: String, day: String) -> String {
return "Hello \(person), today is \(day)."
}
greet(person: "Bob", day: "Tuesday")
或
func greet(_ person: String, day: String) -> String {
return "Hello \(person), today is \(day)."
}
greet("Bob", day: "Tuesday")
縮寫
可以縮寫是因為When a closure’s type is already known, such as the callback for a delegate, you can omit the type of its parameters, its return type, or both. Single statement closures implicitly return the value of their only statement.
numbers.map({
(number: Int) -> Int in
let result = 3 * number
return result
})
或
let mappedNumbers = numbers.map({ number in 3 * number })
!不懂!
var numbers = [20, 19 , 7 , 25]
![]()
![]()
次數從哪裡來?為什麼升幕跟降幕差一次?
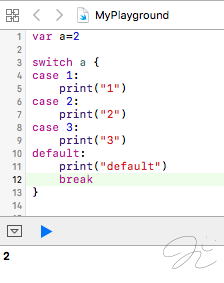
swift 3 的 switch 比較特別的地方在於:
case 跑完時會自己 break
不需要自己再加,不過多加了也不會出錯
swift 寫法
java 寫法
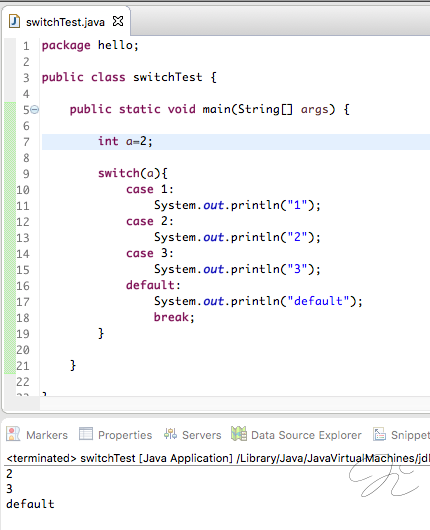
加上 fallthrough 就會像 Java 一樣,詳情:
Apple 官方文件
apple developer Guides and Sample Code:
https://developer.apple.com/library/content/navigation/
The Swift Programming Language (Swift 3)官方文件:
Start Developing iOS Apps (Swift) 快速開始:
iOS 9 上課影片(網路上有人分享字幕):
https://itunes.apple.com/us/course/developing-ios-9-apps-swift/id1104579961
翻譯
官方文件繁體中文翻譯版(swift 3):
https://itisjoe.gitbooks.io/swiftgo/content/
簡體中文(swift 3):
https://www.cnswift.org/a-swift-tour
創建一個空陣列或者字典,使用初始化語法。
To create an empty array or dictionary, use the initializer syntax.
let emptyArray = [String]()
let emptyDictionary = [String: Float]()
如果型態資訊可以被推斷出來,你可以用[]和[:]來創建空陣列和空字典——就像你宣告變數或者給函式傳參數的時候一樣。
If type information can be inferred, you can write an empty array as `[]` and an empty dictionary as `[:]`—for example, when you set a new value for a variable or pass an argument to a function.
shoppingList = []
occupations = [:]
swift 3.0
要宣告變數有兩個方式:var 跟 let
var 是之後值會變(變數)
let 則是常數
如果使用 var ,但是值都沒有改變的話會有黃色三角形提示:值都沒改變,要不要用 let 的訊息
可以點提示會自動幫你把 var 換成 let
根據 swift 2 教學影片,教授說交出去的作業不能有黃色三角形